5 Easy Steps for Painting an Interior Brick Wall
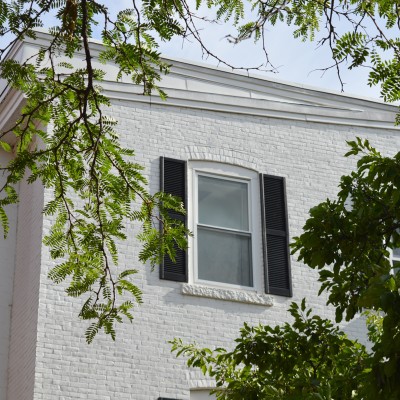
With its unique texture and classic look, brick can be a beautiful addition to a room. It can also look dated in some spaces – and if you don’t like the color of the brick, it's a big project to remove it from the room. The solution - paint it! If you want to give your house a more updated, contemporary feel, the simplest and least expensive way to achieve this is painting. It’s also not very difficult. This is definitely a DIY project anyone can tackle. Are you ready? Here are 5 easy steps for painting an interior brick wall.
As is the case with most painting projects, the prep work for painting brick is very important. Gorgeous results are within reach, but you need to follow all of these steps or risk having an unprofessional looking finish when you're done. We're pretty sure you don’t want that!
Before you dive in, assess the condition of your brick. According to Vanessa Brunner on Houzz, "Brick that's chipping, deteriorating, molding or in overall poor condition is always a bad candidate for paint. Paint blocks the natural pores in the brick's surface, which can cause existing problems to become exaggerated over time." Is yours in good shape? Then you have the green light to move on with your paint job! Here's how...
#1 Figure Out How Much Paint You Need.
Brick is porous (like a sponge), so it’s going to soak up more paint than an ordinary wall. This means you need to plan on using more paint than you normally would. How much more is hard to say exactly because all brick is different. Go on the high side when estimating.
#2 Clean.
This is really important! Dust and dirt are hiding in the bumps and cracks of the brick. All the years of accumulated dust will prevent the paint from gripping to the brick and grout so a thorough cleaning is necessary to create a finish that will last. Vacuuming the brick is an ideal way to start, but you could also sweep the wall with a broom.
Michael Franco on BobVila.com recommends the following:
Before painting brick, always clean it thoroughly so that your application of paint better adheres. Dirt and efflorescence should come off with soapy water and some diligent scrubbing with a stiff-bristled brush. Need something stronger? If you happen to own, or are willing to rent, a pressure washer, consider using one, especially if you need to clean a relatively large expanse of brickwork. Never use acid cleaning solutions, any of which might compromise your paint job.
If the brick has been installed recently, allow it to dry and acclimate for at least a year before painting it. If the installation has already been in place for years, check the mortar for signs of damage. Repair small cracks with acrylic caulk. With more pronounced issues, repointing the brick may be necessary. Whether or not you make any repairs, remember that brick must be completely dry for the paint to adhere successfully. After cleaning, delay painting for a period of at least 24 hours.
Leaving a fan on helps dry out the wall.
#3 Prime Over Stains.
If there's been water damage or any other kind of discoloration in the brick, you should prime the wall first. (You'll actually end up with a better finish if you prime no matter what. Brick's tricky.) We recommend using ECOS Paints Universal Primer because it's a durable, yet non-toxic* stain-blocking primer. It'll adhere well to brick and help ensure that you have a professional looking finish. If you use another stain-blocking primer that's oil-based, make sure you wear a respirator and have plenty of ventilation in the room. The fumes from these primers are pretty toxic and overwhelming!
*Conforms to ASTMD-4236, specifically concerning oral toxicity, skin irritation and respiratory effects.#4 Pick Your Paint.
If the brick is in good shape and there's no staining or discoloration, you can skip priming and get right to painting. ECOS Wall or Trim paints would be excellent choices for this project. They are super durable, have no odor, and also have superior coverage compared to other paints! Whatever brand of paint you decide to use you should use an eggshell finish or glossier so that the wall is cleanable. If you want a very modern look, a high gloss paint will make this wall really stand out when you are finished.
#5 Apply the Paint.
For applying both the primer and the finish coats of paint, use a 1 ¼ inch paint roller sleeve. This is the thickest available, and it’ll get paint in all those little cracks and crannies. It’ll also make this job a lot easier and save you time. Move the roller slowly over the brick because the roller sleeve will be holding a lot of paint, which will splatter if you move too fast. Follow behind with a brush if there are spots that the roller isn’t getting into and to brush out any drips. Let this dry and apply a second coat.
InteriorsAddict.com recommends going heavy with the paint. "To ensure you get the best finish from your paint job, it’s important to do a minimum of two to three coats, allowing the walls to thoroughly dry between coats, so you can assess the color adhesion."

