Mastering the Art of Floor Finishes: Expert Tips for Applying Water-Based Stains and Varnishes

When it comes to achieving a pristine, professional-looking finish on your floors, the quality of the water-based stains and varnishes used plays a vital role. But, equally important is the technique employed during the application process. Following this guide will help you achieve an impeccable finish with ECOS Stains and Varnish, though these tips will enhance the results of any water-based stain and varnish. Let us guide you through best practices when using these products to ensure that your floors look flawless!

Maintain a Wet Edge
One of the secrets to a streak-free finish is to maintain a wet edge when applying the stain, or varnish. This means working quickly enough to ensure that the edge of the section you're applying doesn't dry before you overlap it with the next section. Doing this minimizes the chance of overlap marks, or uneven absorption - which can be particularly noticeable with stains. For stains, continually stir the product in the can to avoid separation and ensure a uniform color throughout the application process.

Avoid Lap Marks by Stopping at Board Lines
Lap, or overlap marks — unsightly or darker stripes caused by uneven layering of stain or varnish which spoil a floor's overall appearance. To avoid these, always finish a board in one go rather than stopping midway. Coating the floor at board lines will ensure that each board gets a consistent coating without the risk of lap marks.

Use Painter's Tape to Segment the Floor
Just as an artist sketches before painting, planning is paramount when staining or varnishing a floor. Segmenting a floor allows the job to be tackled systematically. Apply painter's tape to section off smaller areas, particularly around the floor's edges, or any fixtures. For larger floors, segment them into narrower strips along the direction of the boards. This tactic not only ensures a neat application but also lets you focus on more manageable sections, ensuring each one is done perfectly before moving on to the next. Always apply the stain or varnish in the direction of the natural wood grain. When a section is coated and dry, cover its edge with painter’s tape to prevent it from being coated again - which would result in a lap mark.

Mastering the Cut-In Technique
Cutting-in refers to the process of coating the edges of a floor, essentially creating a border. Before using a roller or larger brush for the main surface, use a smaller brush to 'cut-in' around the floor’s perimeter, next to the baseboards, and any fixtures. The key here is to maintain a steady hand, use a high-quality brush, and avoid loading the brush with too much product. Use the same taping technique as previously described to create straight edges to prevent lap marks. Once the floor’s edges are neatly defined, you can proceed with staining or varnishing the main floor area, connecting seamlessly with the cut-in edges.
When to Sand
Water-based products have a tendency to raise the grain of a natural wood floor, leaving it rough to the touch. This can happen after the application of both the stain and varnish and it must be addressed. Lightly sand the rough surface (typically with 180 grit sandpaper) to bring it back to a smooth, even finish, and then wipe-off any dust with a wet cloth before applying the next layer of coating.

Choose High Quality Brushes, Rollers, and Pads
While it might be tempting to save a few dollars by purchasing cheap applicators, investing in high-quality brushes and rollers can make a significant difference. Look for brushes that hold more product and provide smoother application. With water-based stains and varnishes it's recommended to use synthetic bristle brushes for precision and microfiber/lambswool applicator pads (best option) or rollers for larger areas.
Monitor Ambient Conditions
Water-based products can be sensitive to temperature and humidity. Ensure that the room is neither too humid nor too dry, aiming for a relative humidity of about 50%. It's also best to avoid applying stains and varnishes in direct sunlight or on overly hot days.

Conclusion
The beauty of a stained or varnished floor depends on its finish. By following these application tips, you're well on your way to achieving professional-level results with water-based products. Remember, preparation and patience go a long way. Happy staining and varnishing!
RELATED PRODUCTS

Wood Stain
Wood Stain is a tinted, full bodied, fast-drying stain that penetrates wood, changing its color and ...

Interior Satin Clear Varnish
Interior Satin Clear Varnish is a low to medium sheen, protective finish that dries to a hard, washa...

Wood Conditioner
Wood Conditioner helps with a uniform penetration of ECOS stains, particularly on porous woods. Use ...

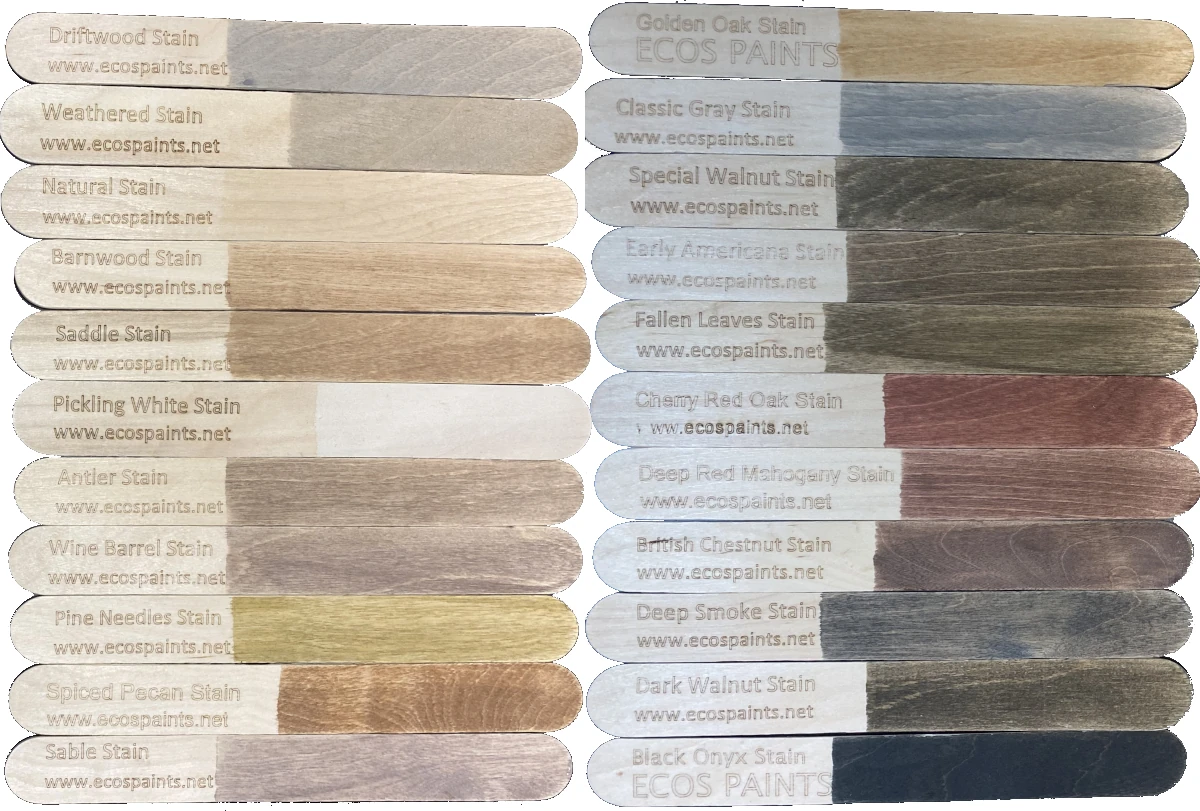
Wood Stain Color Stick
Conveniently test and compare wood stain colors for your project with these 8inch wood stain color s...